

Parmesan Garlic Chicken Mac and Cheese
You're in for a treat with Parmesan Garlic Chicken Mac and Cheese! Imagine this: creamy, cheesy goodness blending with tender chicken for a truly comforting meal. Start by cooking elbow macaroni until it's al dente while sautéing seasoned chicken in olive oil until golden. Whip up a smooth cheese sauce by mixing butter, flour, and milk, then melt in delicious cheeses and garlic for that extra kick. Combine everything in a baking dish, top with crispy breadcrumbs, and bake until bubbly. Trust me, your taste buds will celebrate, and if you stick around, you'll discover even more tips!
Recipe Highlights
- Combine cooked elbow macaroni, seasoned chicken, and a creamy cheese sauce made with Parmesan and garlic for a flavorful dish.
- Prepare the cheese sauce by creating a roux with butter and flour before adding milk and melted cheeses.
- Bake the mixture topped with breadcrumbs and Parmesan at 350°F for 25-30 minutes until golden brown and bubbly.
- Enhance presentation with fresh herbs, a drizzle of olive oil, and serve with garlic bread or a crisp salad.
- Pair with chilled white wine or sparkling water to complement the richness of the dish.
Ingredients You'll Need
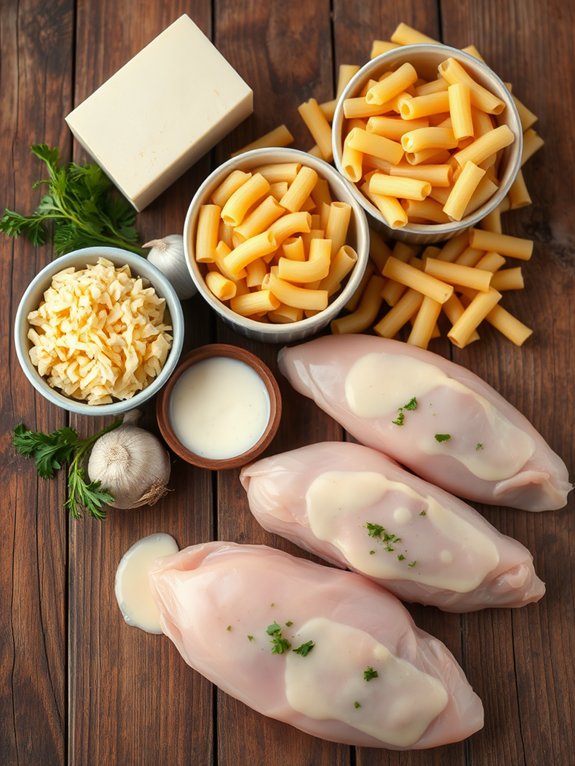
To whip up a delicious Parmesan Garlic Chicken Mac and Cheese, you'll need a handful of key ingredients. First, grab about two cups of elbow macaroni. This little pasta shape is perfect for holding onto all that cheesy goodness!
Next, you can't forget about the chicken—boneless, skinless chicken breasts will work wonders in this dish. You'll also want to have plenty of shredded Parmesan cheese on hand; about a cup should do. It adds that rich, creamy flavor we all crave.
Don't skimp on the garlic either! Fresh garlic cloves will elevate this dish, bringing a delightful aroma and taste.
You'll also need some butter, flour, and milk to create that dreamy cheese sauce. For seasoning, salt and pepper are a must, and feel free to add a pinch of paprika if you want a little extra kick! Additionally, using high-quality non-toxic coatings for your cookware can ensure safe cooking while preparing this dish.
Preparing the Chicken
Once you've gathered all your ingredients, it's time to focus on preparing the chicken. First, grab those boneless, skinless chicken breasts, and rinse them under cold water.
Pat them dry with paper towels—this helps the seasoning stick better! Next, slice them into bite-sized pieces. You want them to cook evenly and absorb all that delicious flavor.
Now, let's season! Sprinkle salt, pepper, and a generous amount of garlic powder over the chicken. Don't be shy! Massage those spices in, making sure every piece gets coated. If you're feeling adventurous, toss in a pinch of paprika for that added kick.
In a large skillet, heat some olive oil over medium heat. Once it's shimmering, add your seasoned chicken.
Hear that sizzle? That's the sound of deliciousness in the making! Cook for about 5-7 minutes, stirring occasionally, until the chicken is golden brown and cooked through. Make sure there's no pink inside—nobody wants a surprise!
Once done, remove the chicken from the skillet and let it rest for a few minutes. This step seals in the juices, ensuring every bite is tender and flavorful. Remember, using high-quality poultry shears can make cutting your chicken easier and more efficient.
You're one step closer to creating a mouthwatering mac and cheese!
Cooking the Pasta
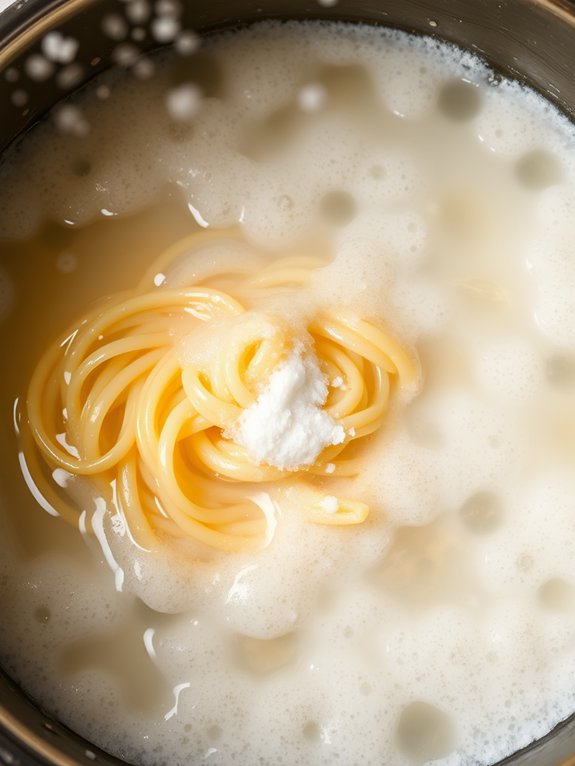
Cooking the pasta is an essential step that sets the foundation for your creamy mac and cheese. You'll want to start by bringing a large pot of salted water to a rolling boil. The salt not only flavors the pasta but also helps it cook evenly.
Once the water's bubbling, add your choice of pasta—elbow macaroni is a classic, but feel free to get creative!
Stir the pasta occasionally to prevent it from sticking, and follow the package instructions for cooking time. You want it cooked al dente, which means it should still have a slight bite when you taste it. This is super important, as it'll soften a bit more when you mix it with the cheese sauce later.
Once it's done, drain the pasta in a colander, but don't rinse it! Rinsing washes away the starch that helps the cheese sauce cling to the noodles. Instead, let it sit for a moment to steam off excess water. A key to achieving a delicious mac and cheese is ensuring you use measurement accuracy to get the right amount of cheese and milk for your sauce.
Now you're ready to blend that perfectly cooked pasta with the rich, creamy cheese sauce that's coming next. Trust me, your taste buds are going to thank you!
Making the Cheese Sauce
How do you create that rich, creamy cheese sauce that makes mac and cheese irresistible? It all starts with a roux—a simple blend of butter and flour. Melt about four tablespoons of butter in a saucepan over medium heat, and once it's bubbly, whisk in four tablespoons of flour. Stir constantly for about two minutes until it's golden, creating a delightful base for your sauce.
Next, gradually pour in two cups of milk, whisking continuously to avoid lumps. Bring the mixture to a gentle simmer, allowing it to thicken for about five minutes. You'll see it transform into a silky sauce that's begging for cheese!
Now comes the fun part: stir in a generous two cups of your favorite cheeses. Sharp cheddar is classic, but don't shy away from mixing in some creamy mozzarella or a sprinkle of Parmesan for that extra flavor kick.
Season your sauce with salt, pepper, and maybe a pinch of garlic powder for that savory touch. As it melts and combines, you'll be captivated by the aroma. This cheese sauce is the heart of your mac and cheese, ready to bring comfort and joy to your meal! Additionally, using high-quality non-stick cookware can make the process of melting the cheese and blending the sauce even easier, ensuring a smooth consistency.
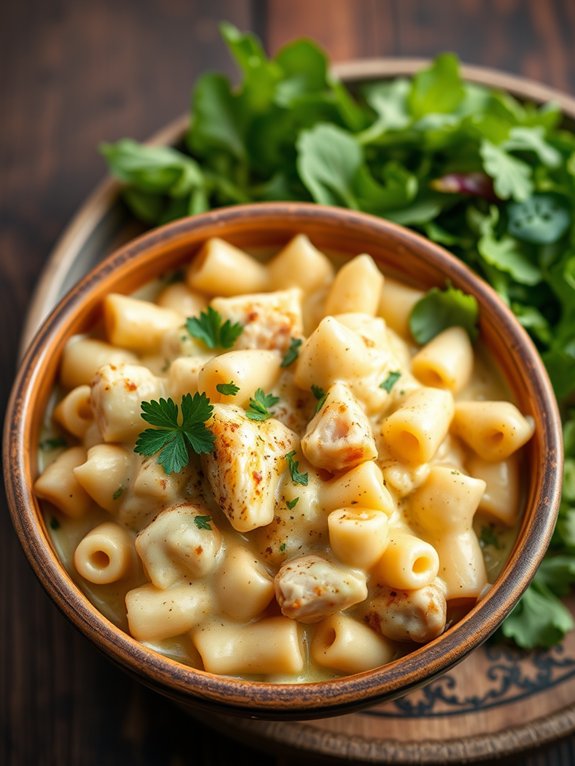
Combining Ingredients
Now that you've crafted that luscious cheese sauce, it's time to unite it with the pasta and chicken. Grab your cooked macaroni and let's plunge in! Start by adding the pasta to a large mixing bowl. Pour that creamy cheese sauce over the pasta, and don't forget to mix it well. You want every piece of macaroni to soak up that cheesy goodness. Next, chop up your cooked chicken into bite-sized pieces and toss it into the mix.
To make sure you've got everything covered, here's a quick breakdown of what you're combining:
| Ingredient | Purpose |
|---|---|
| Cooked Macaroni | Base of the dish |
| Cheese Sauce | Creamy, flavorful layer |
| Cooked Chicken | Protein boost and heartiness |
| Garlic & Parsley | Flavor explosion and freshness |
As you combine each ingredient, feel free to add some extra garlic or herbs to taste! This is your creation, so make it your own. Stir it all together until it's beautifully blended, and get ready for the next exciting step in this cheesy adventure! Remember, incorporating meal prep strategies can help streamline your cooking process and save time during busy mornings.
Baking the Dish
With the pasta and chicken perfectly combined, it's time to bring it all together in the oven. Preheat your oven to 350°F (175°C) and grab a baking dish—preferably one that's big enough to hold all that cheesy goodness.
Pour your creamy macaroni and chicken mixture into the dish, spreading it evenly. You want every bite to be as cheesy as the last!
Now, let's talk about that crispy topping. Sprinkle a generous layer of breadcrumbs mixed with a bit of parmesan cheese on top. This'll create a delightful crunch that contrasts beautifully with the creamy interior.
If you're feeling adventurous, toss in some extra garlic powder or Italian seasoning for an added flavor punch.
Once your masterpiece is assembled, pop it in the oven and let it bake for about 25-30 minutes. You'll know it's ready when the top is golden brown and bubbly, filling your kitchen with an irresistible aroma that'll have everyone keenly waiting. Remember, using a roasting pan can enhance heat distribution, ensuring even cooking.
Trust me, you won't be able to resist sneaking a taste before it's done! When it's finally out of the oven, let it cool for a few minutes, and prepare for a cheesy, garlicky delight!
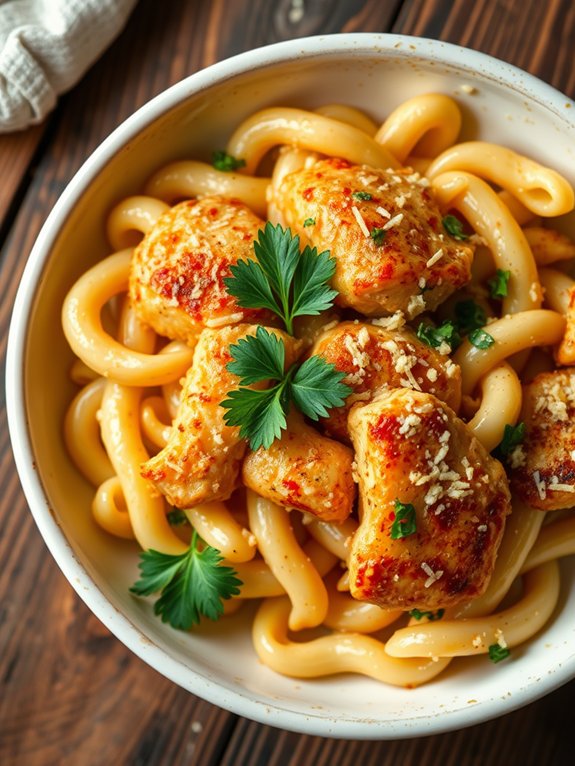
Serving Suggestions
When it comes to serving your Parmesan Garlic Chicken Mac and Cheese, a few thoughtful touches can elevate the experience. Start by plating your mac and cheese in individual bowls for a cozy presentation. A sprinkle of fresh parsley or basil on top not only adds a pop of color but also enhances the flavor. If you want to take it up a notch, serve it with a side of garlic bread or a crisp green salad. These additions will perfectly balance the richness of the dish. Additionally, using durable materials for your serving platters ensures they remain a staple in your entertaining toolkit for years to come.
Check out the quick serving suggestions below:
| Serving Option | Description |
|---|---|
| Garlic Bread | Crunchy, buttery perfection to complement the creamy mac and cheese. |
| Green Salad | A revitalizing mix of greens to lighten up the meal. |
| Roasted Vegetables | Caramelized veggies add a savory depth and texture contrast. |
Don't forget to pair your meal with a chilled glass of white wine or a fun mocktail for a delightful touch! With these suggestions, you'll create a dining experience that's not just a meal but a celebration. Enjoy every creamy, cheesy bite!
Storage Tips
To keep your Parmesan Garlic Chicken Mac and Cheese fresh, store any leftovers in an airtight container within two hours of cooking. This step is essential to maintain that creamy, cheesy goodness you love!
Make sure to cool it down to room temperature before sealing it up; this helps prevent condensation, which can make your delicious meal soggy.
When it comes to refrigeration, your mac and cheese will stay tasty for about three to five days. Just remember to label the container with the date, so you don't forget when it was made.
If you've got a larger batch, consider portioning it out into smaller containers. This way, you can easily grab just what you need for lunch or dinner.
For longer storage, you can freeze it! Just make sure to use freezer-safe containers, and it should last for up to three months.
When you're ready to enjoy it again, thaw it in the fridge overnight and reheat it gently on the stovetop or in the microwave. A splash of milk while reheating can help bring back that creamy texture.
Enjoy your leftovers, because they're just as delightful the second time around!
Frequently Asked Questions
Can I Use a Different Type of Cheese?
Absolutely, you can use a different type of cheese!
Experimenting with cheeses like cheddar, gouda, or mozzarella can add a delightful twist to your dish. Each cheese brings its unique flavor and creaminess, so don't be afraid to mix and match.
Just remember, some cheeses melt better than others, so choose wisely.
Get creative and let your taste buds guide you—cooking is all about having fun and discovering new favorites!
How Can I Make This Dish Gluten-Free?
To make your dish gluten-free, swap regular pasta for gluten-free varieties like brown rice or chickpea pasta.
They'll still deliver that comforting vibe! You can also use gluten-free breadcrumbs for a crispy topping.
Just imagine savoring every bite, knowing it's friendly for gluten-sensitive friends!
Don't forget to check labels on your sauces and seasonings, as hidden gluten can sneak in.
With these swaps, you'll create a delicious gluten-free masterpiece everyone can enjoy!
What Sides Pair Well With This Mac and Cheese?
When it comes to pairing sides with mac and cheese, you've got some delicious options!
Try a crisp, invigorating salad with mixed greens and a zesty vinaigrette to balance that creamy goodness.
Roasted veggies are another fantastic choice—they add color and flavor!
If you're feeling adventurous, some spicy garlic bread can elevate the dish even more.
Trust me, these sides will complement your mac and cheese perfectly, making your meal unforgettable!
Can I Prepare This Dish Ahead of Time?
Absolutely, you can prepare this dish ahead of time!
Just whip it up, let it cool, and store it in the fridge.
When you're ready to serve, pop it in the oven to reheat.
It'll taste just as delicious!
You'll love how convenient this is for busy days or gatherings.
Plus, your friends and family will be thrilled when you reveal your tasty creation.
Get ready for some happy taste buds!
How Do I Reheat Leftovers Without Drying Them Out?
To reheat your leftovers without drying them out, try using the stovetop method!
Just add a splash of milk or broth in a skillet, then toss in your dish over low heat. Stir occasionally, letting everything warm up gently while keeping that creamy goodness intact.
If you're using the microwave, cover it with a damp paper towel to trap moisture.
Trust me, it'll taste almost as good as when you first made it!


