

S’mores Cookie Bars
S'mores cookie bars are a mouthwatering twist on the classic campfire treat that you simply can't resist! You'll mix graham cracker crumbs, all-purpose flour, and creamy butter to create a chewy base. Fold in chocolate chips and fluffy mini marshmallows for that iconic flavor explosion. Bake at 350°F until golden, then let 'em cool. The result? A gooey, sweet treat that's perfect for any gathering! You can even get creative by adding nuts or swapping chocolate types. So, grab your baking dish and release your inner pastry chef—there's more to discover and savor in the world of S'mores cookie bars!
Recipe Highlights
- S'mores cookie bars combine graham cracker crumbs, chocolate chips, and mini marshmallows for a classic campfire flavor in a convenient bar form.
- Preheat your oven to 350°F (175°C) and bake the bars for 25-30 minutes until golden brown and slightly firm.
- Layer half the dough in a baking dish, add chocolate and marshmallows, then crumble the remaining dough on top for even distribution.
- Store cooled bars in an airtight container for up to five days or freeze wrapped individually for up to three months.
- Serve with cold milk or hot cocoa, and enhance presentation with toppings like whipped cream or chocolate drizzle for added appeal.
Ingredients Needed
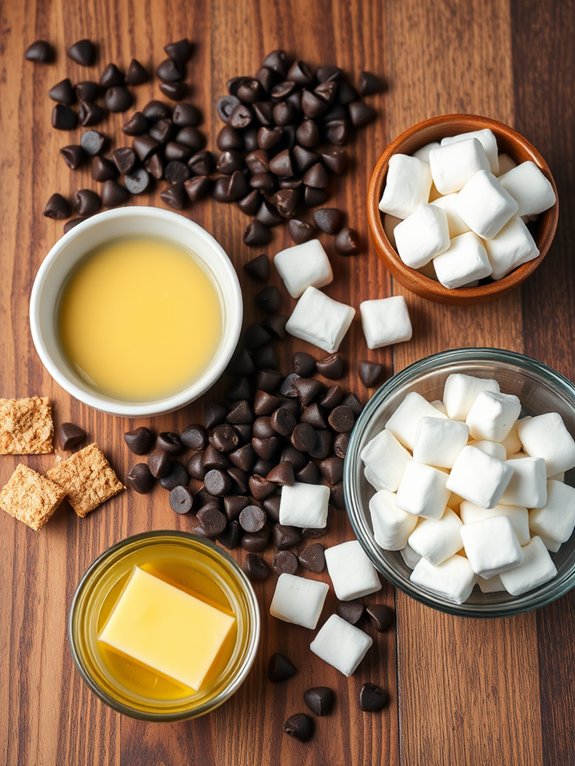
To whip up delicious S'mores Cookie Bars, you'll need a handful of key ingredients that come together to create that classic campfire treat in bar form.
First up, grab some graham cracker crumbs. They're the base of this delightful dessert, bringing that iconic crunch and sweetness.
Next, you'll want to have all-purpose flour on hand; it helps bind everything together and gives the bars a chewy texture.
Don't forget the unsalted butter! You'll use it to create a rich, buttery flavor that's hard to resist.
For sweetness, you'll need brown sugar and granulated sugar, which lend that perfect touch of sweetness and a hint of caramel flavor.
Now, let's talk about chocolate; you can't have S'mores without it! Use milk chocolate chips for that gooey, melt-in-your-mouth experience.
And, of course, mini marshmallows are essential for that fluffy, marshmallow goodness. Additionally, using non-porous materials in your mixing bowls can help ensure easy cleanup after baking.
Preparation Steps
Get ready to plunge into the preparation steps for your S'mores Cookie Bars! First, you'll want to gather your ingredients and tools. You need a mixing bowl, a spatula, and a baking dish. Preheat your oven to 350°F (175°C) to get things warming up!
Start by creaming the butter and sugars together in your mixing bowl until it's light and fluffy. This step's essential, so don't rush it!
Next, add in the eggs and vanilla, mixing until everything's combined. Now, carefully fold in the flour, graham cracker crumbs, baking soda, and a pinch of salt. You should see a lovely dough forming.
Once your dough is ready, spread half of it evenly into your prepared baking dish. Make sure it's nice and even so every bite is delicious.
Then, it's time to layer on those gooey marshmallows and rich chocolate chips. Crumble the remaining dough on top, covering everything as best you can. Remember to use a mixer with multiple speed settings for optimal texture in your cookie dough.
You're almost there! Just make sure to clean up a bit—your kitchen deserves some love too. Now you're prepped and ready for the next exciting step! Happy baking!
Baking Instructions
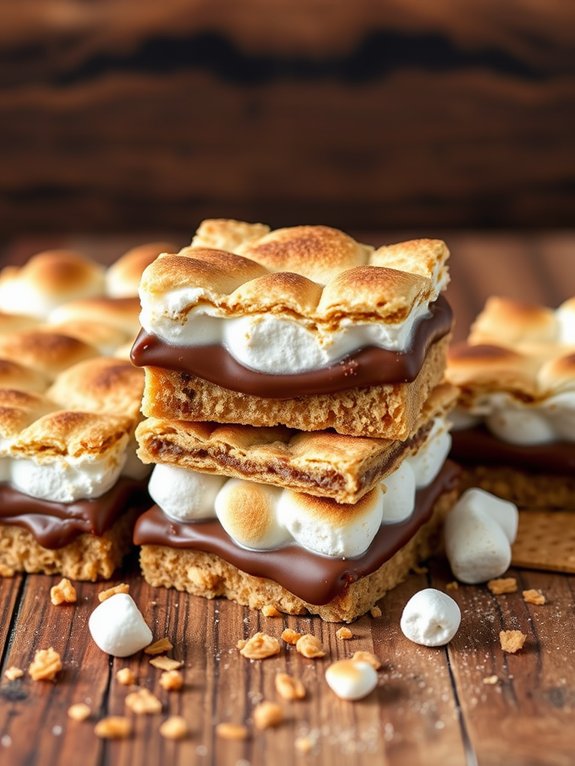
Now that your S'mores Cookie Bars are assembled, it's time to bake them to perfection. Preheat your oven to 350°F (175°C) and grab your favorite baking dish, preferably an 8×8-inch pan.
You'll want to line it with parchment paper for easy removal later on. Choosing a high-quality option will ensure that your bars don't stick to the pan, as many brands have excellent non-stick properties. Once your oven is preheated, spread the cookie dough evenly across the bottom of the pan, pressing it down firmly.
Next, sprinkle a generous layer of chocolate chips and mini marshmallows over the top. Don't hold back—this is where the magic happens!
Then, take the remaining cookie dough and crumble it over the marshmallows, covering them as best as you can.
Pop the pan into the oven and bake for about 25 to 30 minutes. You're looking for a golden-brown top that's slightly firm to the touch, but don't worry if it's a little gooey in the center—it's all part of the charm!
Once baked, let your bars cool in the pan for at least 15 minutes. This is the perfect time to savor the delicious aroma wafting through your kitchen.
Get ready for a treat that's sure to impress!
Tips for Perfect Bars
Achieving the perfect S'mores Cookie Bars requires attention to a few key details.
First, make sure you're using fresh ingredients. Softened butter and high-quality chocolate can make all the difference in flavor and texture. When mixing your dough, don't overmix; you want a chewy, tender bar, not a tough one!
Next, layer those ingredients wisely. Start with half the dough, then add a generous layer of chocolate and marshmallows before topping with the remaining dough. This balances the flavors beautifully.
Also, keep an eye on your baking time. Every oven is different, so start checking a couple of minutes early. You want the edges to be golden brown and the center just set; it'll firm up as it cools. Consider using high-quality bags to ensure your icing flows smoothly and enhances the presentation of your bars.
Variations to Try
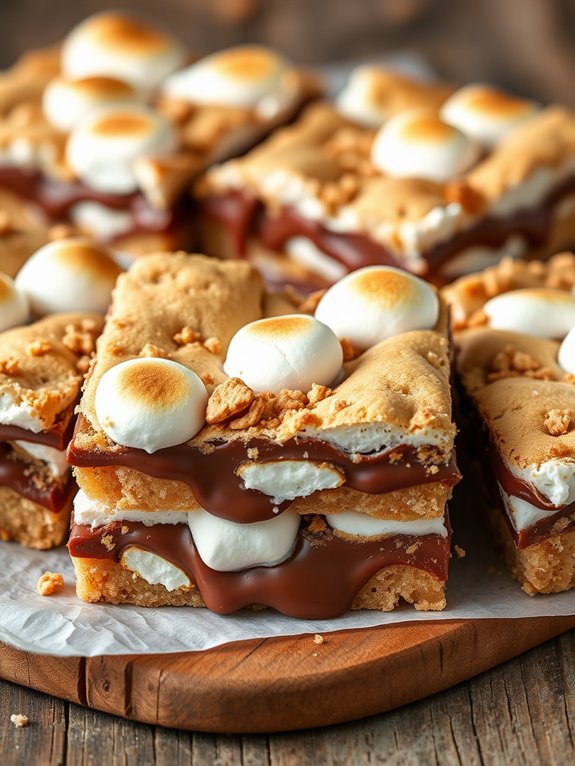
While classic S'mores Cookie Bars are delicious on their own, experimenting with different ingredients can elevate your treat to a whole new level.
Why not swap out the traditional chocolate for peanut butter cups? The creamy richness will bring a delightful twist that'll have everyone raving.
Or, if you're a fan of mint, add some mint chocolate chips to the mix. The fresh burst of mint combined with the gooey marshmallows creates a revitalizing flavor explosion!
Feeling adventurous? Try adding crushed pretzels for a salty crunch that pairs perfectly with the sweet elements. It's like a party in your mouth!
You can also play with different types of graham crackers—cinnamon or honey can add a warm depth.
For a fruity touch, consider layering in some sliced strawberries or bananas. They'll add a burst of freshness and make your bars feel extra special.
Don't forget about the toppings! A drizzle of caramel or a sprinkle of sea salt can take your bars from great to absolutely irresistible. Additionally, incorporating meal prep strategies can help you enjoy these delightful bars throughout the week without the hassle of daily baking.
Storing Your Cookie Bars
To keep your S'mores Cookie Bars fresh and delicious, proper storage is key. You want to savor those gooey, chocolatey layers for as long as possible, right?
Start by letting your cookie bars cool completely before storing them. This step prevents condensation, which can lead to sogginess.
Once cooled, grab an airtight container—this is your best friend! Line it with parchment paper for easy removal, then place your cookie bars in a single layer.
If you've made a big batch and want to save some for later, you can freeze them too! Just wrap individual bars tightly in plastic wrap and then place them in a freezer-safe bag. They'll stay fresh for up to three months.
When you're ready to enjoy, let them thaw in the fridge for a few hours or pop them in the microwave for a few seconds to regain that melty goodness. Remember, using airtight seals in your storage container is essential for maintaining freshness and preventing spills.
Serving Suggestions
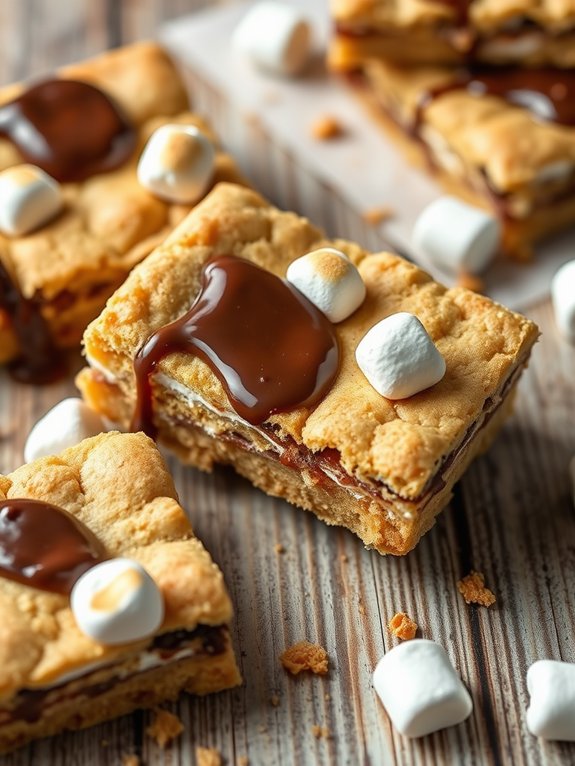
When it comes to serving your S'mores Cookie Bars, presentation can elevate the experience. You want to make these delicious treats as visually appealing as they're tasty! Start by cutting your bars into neat squares or rectangles, and consider using a sharp knife for clean edges.
Place them on a colorful platter or a rustic wooden board for a charming touch. To enhance that S'mores vibe, sprinkle some mini marshmallows and crushed graham crackers on top. A drizzle of melted chocolate can take your presentation to the next level—just imagine that glossy finish!
Pair these cookie bars with a scoop of vanilla ice cream or a dollop of whipped cream for that extra indulgence. If you're feeling adventurous, try serving them warm, so the chocolate is gooey and the bars are soft. Additionally, presenting your dessert on a durable serving platter can enhance both the look and functionality of your dessert display.
Don't forget the drinks! A glass of cold milk or a hot cocoa on the side can make your dessert experience even more delightful.
Whether you're hosting a party or enjoying a cozy night in, these serving suggestions will surely impress your guests and satisfy your sweet tooth! Enjoy every bite!
Frequently Asked Questions
After you've served your S'mores Cookie Bars and wowed your guests, you might find yourself answering a few common questions about this delightful treat. Here's a quick guide to help you shine as the S'mores connoisseur!
| Question | Answer |
|---|---|
| Can I use different chocolates? | Absolutely! Feel free to mix and match your favorite chocolates. Dark, milk, or even white chocolate works great! |
| How do I store leftovers? | Store them in an airtight container at room temperature for up to five days. You can also refrigerate them for longer freshness. |
| Can I freeze S'mores Cookie Bars? | Yes! Wrap them tightly in plastic wrap and freeze for up to three months. Just thaw before serving. |
| What's the best way to cut them? | Use a sharp knife and cut while the bars are slightly warm for neat slices. |
| Can I add nuts or other toppings? | Definitely! Chopped nuts or even peanut butter chips can add an exciting twist. |
These answers should help you confidently discuss your scrumptious S'mores Cookie Bars. Enjoy sharing your creation and the joy it brings to everyone! Additionally, you might consider serving your S'mores Cookie Bars with a multifunctional appliance like an air fryer for a unique twist on presentation.
Frequently Asked Questions
Can I Use Gluten-Free Flour for These Cookie Bars?
Absolutely, you can use gluten-free flour for those cookie bars!
It's like a magical flour that opens up a world of deliciousness for everyone. Just make sure to choose a good blend, preferably one with xanthan gum, to keep that perfect texture.
You'll want to adjust the baking time slightly, but don't worry, it'll be worth it! Your cookie bars will be a hit, and everyone will be begging for more!
Enjoy!
How Long Do the Bars Last at Room Temperature?
Once you've baked those delicious bars, you'll want to know how long they last at room temperature.
Good news! They'll stay fresh for about 3 to 5 days when stored in an airtight container.
Just make sure they're kept away from direct sunlight and heat!
Trust me, you'll want to enjoy every last crumb.
So, grab a friend, share a few, and savor the sweet moments together.
Happy snacking!
Can I Make These Cookie Bars Vegan?
Absolutely, you can totally make these cookie bars vegan! Just swap out regular butter for coconut oil or a vegan butter substitute, and use a flaxseed meal or chia seed mixture as an egg replacement.
For the chocolate, grab some dairy-free chocolate chips, and you're good to go!
You'll still get that delicious, gooey texture and flavor you crave. Get ready to impress your friends with your amazing vegan baking skills!
What Type of Chocolate Is Best for S'mores Bars?
When it comes to chocolate for your treats, you can't go wrong with classic milk chocolate! Its creamy sweetness melts beautifully and balances perfectly with other flavors.
If you're craving something deeper, dark chocolate adds a rich kick that'll satisfy those intense cravings.
For a fun twist, try flavored chocolates like caramel or sea salt varieties.
Whichever you choose, make sure it's high-quality—you want that delightful gooeyness to shine through!
Can I Freeze S'mores Cookie Bars for Later?
Absolutely, you can freeze those delicious cookie bars for later!
Just wrap them tightly in plastic wrap or aluminum foil, then pop them in an airtight container.
When you're ready to indulge, let them thaw at room temperature or warm them up in the microwave for a few seconds.
It's like having a sweet surprise waiting for you!
Trust me, you'll love the convenience of having a tasty treat on hand whenever you crave it!


