

Beef and Cheddar Sliders
Beef and cheddar sliders are pure culinary magic that'll have your taste buds dancing! Start with juicy 80% lean ground beef, seasoned simply with salt, pepper, and a hint of garlic powder. Form those tasty patties, grill them to perfection, and don't forget to melt some high-quality cheddar on top! Choose soft, fluffy buns, like buttery brioche or uniquely chewy pretzel, to cradle your mini masterpieces. Customize them with crispy bacon, spicy jalapeños, or tangy BBQ sauce for extra flavor! Pair them with sweet potato fries, and you'll have a knockout meal. Get ready to impress your guests with this deliciousness!
Recipe Highlights
- Use 80% lean ground beef for juicy and flavorful sliders, forming quarter-inch thick patties with an indentation for even cooking.
- Cook patties on medium-high heat for 3-4 minutes per side, adding cheddar cheese to melt before serving.
- Select soft and sturdy slider buns, such as brioche or pretzel, to hold the ingredients without falling apart.
- Customize sliders with various toppings and condiments like bacon, jalapeño relish, ketchup, and mustard for added flavor.
- Store leftover sliders in airtight containers for up to three days in the refrigerator or freeze for up to three months.
Ingredients Needed
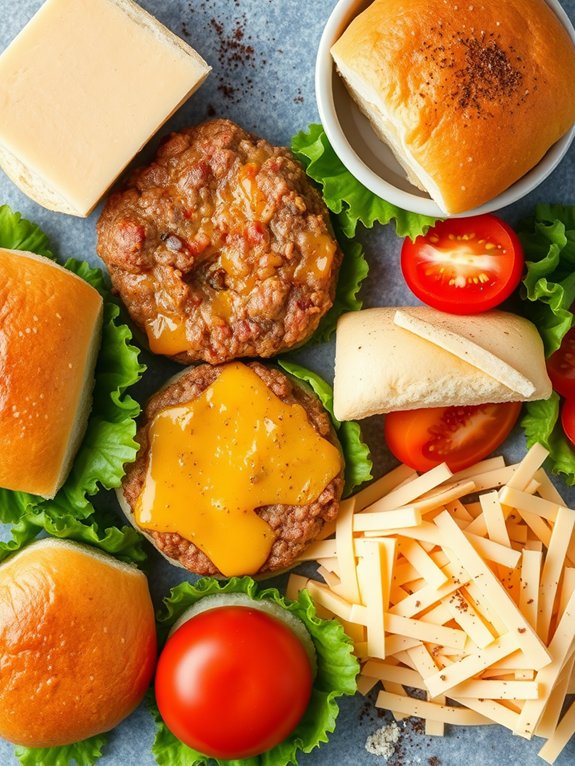
To whip up delicious Beef and Cheddar Sliders, you'll need a handful of key ingredients. First off, grab some ground beef—about a pound will do. It's the star of your sliders and brings that juicy flavor everyone loves.
Don't forget to get some cheddar cheese, either sliced or shredded. Melting this cheesy goodness on top of your beef is what takes these sliders to the next level!
You'll also want slider buns. These little guys are perfect for holding all that deliciousness together. Pick up a pack of soft, fluffy buns that'll complement your beef and cheese.
For seasoning, grab some salt, pepper, and maybe a sprinkle of garlic powder to enhance the flavors. If you're feeling adventurous, toss in some diced onions or jalapeños for a kick!
Lastly, you might want to snag some condiments like ketchup, mustard, or even a tangy barbecue sauce to drizzle on top. Trust me, a little extra zing never hurts!
With these ingredients, you're already on your way to creating sliders that'll have everyone coming back for seconds. Get ready to impress your friends and family with your culinary skills! Additionally, using a non-stick coating can enhance your cooking experience and make cleanup easier.
Preparing the Beef Patties
When it comes to preparing the beef patties, you'll want to start with the ground beef you picked up earlier. Choose a blend with around 80% lean meat and 20% fat for the juiciest sliders.
Grab a mixing bowl and your hands—yes, it's time to get a little messy! You'll need about a pound of beef for around eight sliders. Gently break it apart, and don't overwork it; you want those patties tender, not tough.
Now, season the beef! A simple mix of salt, pepper, and a pinch of garlic powder can elevate the flavor to new heights. If you're feeling adventurous, toss in some Worcestershire sauce for a savory kick.
Once seasoned, divide the beef into equal portions and shape them into patties. Aim for about a quarter-inch thickness; they'll shrink a little while cooking.
Make a small indentation in the center of each patty. This little trick helps them cook evenly and prevents that pesky puffing up! Additionally, using freshly ground beef can enhance the flavor profile due to the quality of material used in the grinding process.
Now you're all set and ready to move on. These beef patties are the perfect base for your sliders, and they're just waiting to shine!
Cooking the Sliders
Cooking the sliders is where the magic happens! You're about to transform those beautifully shaped beef patties into mouthwatering sliders that'll leave everyone cheering for more. Start by preheating your grill or skillet over medium-high heat. Once that's nice and hot, add a touch of oil to prevent sticking. Carefully place your patties on the cooking surface and let them sizzle for about 3-4 minutes. Flip them, and add a slice of cheddar on top of each patty, letting it melt into gooey perfection. Remember to use a meat thermometer to ensure you achieve the optimal cooking temperatures for different meats without undercooking or overcooking.
Here's a handy table to help you track your cooking times and temperature:
| Time (Minutes) | Internal Temperature (°F) |
|---|---|
| 3 | 120 |
| 4 | 130 |
| 5 | 140 |
| 6 | 155 |
| 7 | 160 |
Cook until you reach your desired doneness, but remember, sliders are best served juicy! Once done, take them off the heat and let them rest for a minute. This allows those delicious juices to redistribute. Now, get ready to assemble your sliders!
Choosing the Right Buns
Selecting the right buns can elevate your beef and cheddar sliders to a whole new level. Imagine this: you take a big bite, and the bun perfectly complements the juicy beef and gooey cheddar. You want buns that are soft yet sturdy enough to hold all that deliciousness without falling apart.
Consider using slider buns, which are often smaller and designed specifically for these tasty bites. Brioche buns are a fantastic choice, too! They're slightly sweet, buttery, and will add a touch of luxury to your sliders.
If you're after something a little heartier, try pretzel buns; their unique flavor and chewy texture will take your sliders to new heights.
Don't forget about whole wheat or artisan options for a more rustic feel! Just make sure they're fresh, as stale buns can ruin the whole experience. You want each bite to be a delightful combination of flavors and textures. Choosing the right buns can also enhance the overall dining experience, similar to selecting high-quality cutting boards that improve food safety and presentation.
Melting the Cheddar
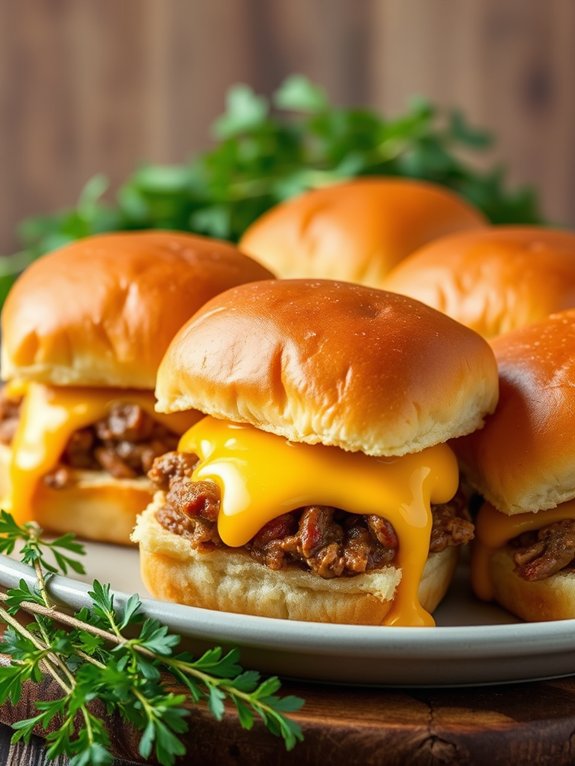
Achieving that perfectly melted cheddar is essential for your beef and cheddar sliders. There's nothing quite like that gooey, golden layer of cheese that pulls apart in delicious strings, tempting everyone around. To get there, you'll want to use high-quality cheddar; it melts beautifully and adds a rich flavor that elevates your sliders.
Start by slicing your cheddar into even pieces, ensuring they'll melt uniformly. As your sliders are cooking, keep an eye on the heat. Too high, and you risk burning the cheese; too low, and it won't melt at all.
Once your beef patties are nearly done, place the cheddar slices right on top. Cover the skillet or grill with a lid for a minute or two. This traps steam, creating that perfect melting environment.
You'll know it's ready when you see the edges starting to bubble and the cheese takes on that irresistible, creamy texture. If you're feeling adventurous, consider adding a splash of Worcestershire sauce or a sprinkle of garlic powder right before the cheese goes on. It'll add an extra layer of flavor that'll have everyone coming back for more! Additionally, using a high-quality non-stick cookware can help prevent the cheese from sticking and make cleanup a breeze.
Customizing Your Sliders
Frequently, you might find yourself wanting to mix things up with your sliders, and customizing them can be a fun way to cater to different tastes. Start by experimenting with the beef. Swap in ground turkey or even plant-based alternatives for a unique twist.
Don't forget about the spices! A dash of smoked paprika or a sprinkle of garlic powder can take your sliders to the next level.
Next, let your toppings shine. Try adding crispy bacon, sautéed mushrooms, or spicy jalapeños for an extra kick. You can also switch up the cheese—pepper jack or blue cheese can add bold flavors that'll wow your guests.
And let's talk about the buns! Instead of the standard slider buns, consider using pretzel rolls or mini baguettes for a rustic touch.
Want to elevate the experience? Top your sliders with a dollop of zesty aioli or tangy barbecue sauce. Additionally, serving your sliders on high-quality materials can enhance their presentation and durability during gatherings.
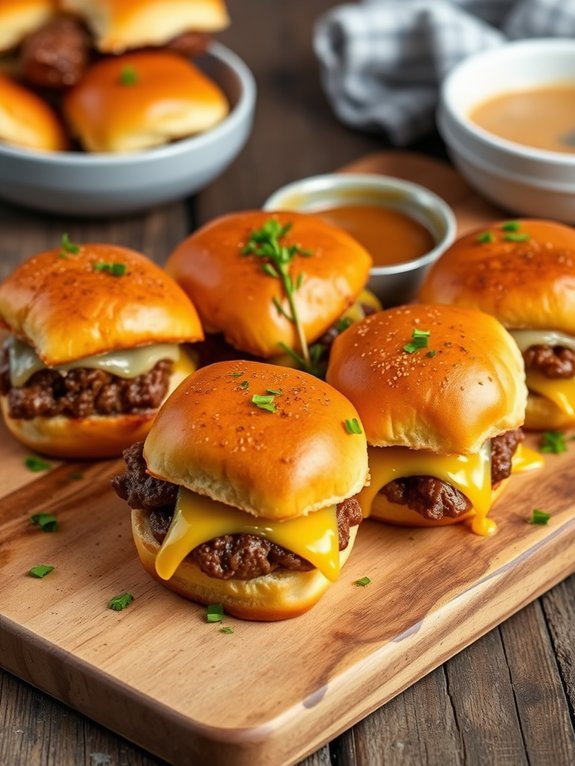
Serving Suggestions
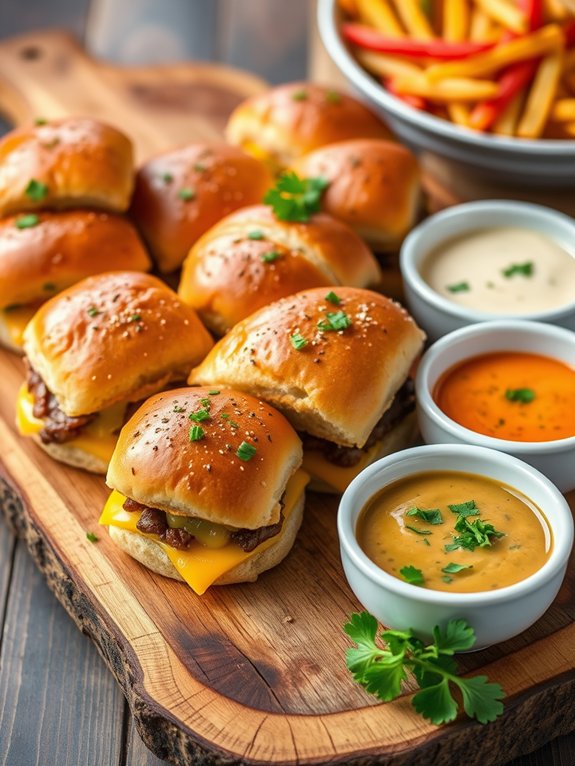
When it comes to serving your beef and cheddar sliders, presentation can make all the difference. Imagine placing those delicious little bundles of joy on a vibrant platter that grabs everyone's attention. You can line them up like soldiers, or even stack them for a fun, tower-like effect.
Garnish the platter with some fresh parsley or colorful veggies to add a pop of color and freshness.
Don't forget about the condiments! Set out a variety of sauces like tangy barbecue, zesty mustard, or creamy ranch for that extra burst of flavor. You could even create a mini "slider bar" where guests can customize their own sliders, choosing toppings like crispy bacon, sautéed onions, or spicy jalapeños.
For a complete meal experience, consider serving your sliders alongside crispy sweet potato fries or a fresh salad. This adds an exciting contrast to the rich flavors of the sliders. Additionally, using elegant designs for your serving platters can enhance the overall presentation, making your dish even more inviting.
And if you want to bring a little fun to the table, skewers can be a great way to hold those sliders together and make them easy to grab. With these serving suggestions, you'll wow your guests and make your beef and cheddar sliders the star of the show!
Pairing Drinks
To elevate your beef and cheddar sliders, consider pairing them with the right drinks that complement their rich flavors. A classic choice is a cold beer, especially a malty lager or a hoppy IPA. The carbonation cuts through the richness of the sliders, revitalizing your palate with every bite.
If you're feeling adventurous, try a stout! Its creamy texture and roasted notes can create a delightful contrast, enhancing the savory goodness of your sliders.
For a non-alcoholic option, a fizzy ginger ale or a homemade lemonade can do wonders. The sweetness balances the savory flavors while the fizz keeps things lively.
If you're hosting a gathering, think about serving a fruity punch—it's a fun way to add a splash of color and excitement!
Don't forget about wine! A medium-bodied red, like a Merlot or a Zinfandel, can bring out the beef's depth, making your sliders even more irresistible. Additionally, consider serving freshly brewed coffee made with advanced brewing technologies to provide a delightful finish to your meal.
You can't go wrong with this pairing approach; it'll transform your meal into an unforgettable experience. So grab your drinks, settle in, and enjoy every flavorful moment with your delicious beef and cheddar sliders!
Storage Tips
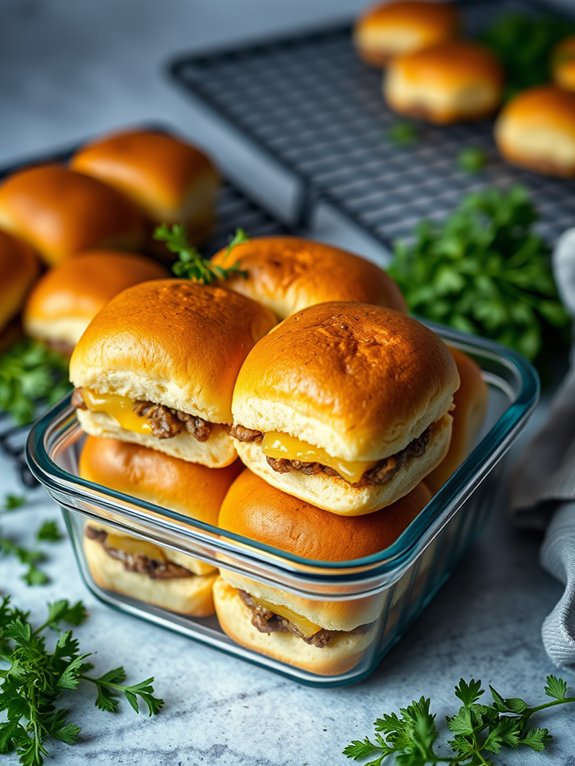
After enjoying your beef and cheddar sliders and their delightful drink pairings, you might find yourself with some leftovers. Don't fret! Proper storage can keep those delicious flavors intact for your next meal.
First, let the sliders cool down a bit. You don't want to trap steam in the container, which can make them soggy.
Once they're cool, wrap each slider tightly in plastic wrap or foil, ensuring they're snug as a bug in a rug. If you're feeling fancy, you can use an airtight container. Either way, make sure they're sealed well to keep out unwanted air.
Store them in the fridge for up to three days, or if you want to save them for later, pop them in the freezer! They can last up to three months in there. Using BPA-free materials for your storage options can further enhance food safety and quality.
When you're ready to dig in again, just reheat them in the oven for a few minutes, and watch that cheese get melty once more! You might even want to add a splash of your favorite sauce to liven things up.
Enjoy those sliders again, because who doesn't love a second helping of beefy goodness?
Variations to Try
Countless variations can elevate your beef and cheddar sliders to new heights, making each meal a unique experience.
Why not switch things up with different toppings? Try adding crispy bacon or a zesty jalapeño relish for an extra kick. If you're feeling adventurous, consider a tangy barbecue sauce or a spicy Sriracha aioli to give your sliders a flavorful twist.
You can also play around with the cheese! While cheddar is a classic, why not experiment with pepper jack for a spicy flair or creamy gouda for richness?
Veggie lovers can swap the beef for grilled portobello mushrooms or even a savory lentil patty, ensuring everyone can enjoy a delicious slider.
Don't forget about the buns! Instead of traditional sliders, use pretzel buns for a delightful twist, or try mini bagels for a fun bagel slider.
And if you want to add a touch of elegance, top your sliders with caramelized onions or fresh arugula.
With so many variations to explore, your beef and cheddar sliders can become a canvas for endless creativity.
Frequently Asked Questions
Can I Use Ground Turkey Instead of Beef for Sliders?
Absolutely, you can use ground turkey instead of beef for sliders! Ground turkey offers a leaner alternative that packs in flavor while cutting down on fat.
Just season it well with your favorite spices, and don't forget to add a dash of creativity—maybe some garlic or herbs!
You'll be amazed at how delicious these sliders can be. So, fire up that grill or skillet, and get ready for a tasty treat!
What Type of Cheese Pairs Best With Beef Sliders?
When it comes to cheese for your sliders, you can't go wrong with melty cheddar! It adds a rich, creamy flavor that perfectly complements the juicy beef.
If you want to spice things up, try pepper jack for a little kick!
For a classic vibe, Swiss cheese brings that delightful nuttiness.
Don't forget about blue cheese if you're feeling adventurous—it'll add a bold twist.
Whatever you choose, your sliders will be a hit!
How Do I Fix Dry Patties After Cooking?
You've just cooked up a storm, but oh no, those patties turned out drier than a desert!
Don't fret; a splash of beef broth or a dollop of barbecue sauce can work wonders.
Consider making a flavorful sauce to drizzle over them, or even mix in some sautéed onions for moisture.
If you're feeling adventurous, try adding a little cheese on top and letting it melt—who doesn't love a cheesy fix?
Enjoy!
Can I Prepare Sliders in Advance for a Party?
Absolutely, you can prepare sliders in advance for your party!
Just cook the patties and assemble them with your favorite toppings, then store them in the fridge.
When it's time to serve, pop them in the oven for a quick warm-up.
You'll wow your guests with delicious sliders, and you won't be stuck in the kitchen while everyone else is having fun.
Plus, it makes for a stress-free party planning experience! Enjoy!
What Are Some Gluten-Free Bun Options for Sliders?
Why settle for boring buns when you can jazz up your sliders with gluten-free options?
You've got a world of choices! Try lettuce wraps for a fresh crunch or corn tortillas for a tasty twist.
If you're craving something more traditional, check out gluten-free hamburger buns made from almond or coconut flour.
You'll impress your guests while keeping it gluten-free! Enjoy the deliciousness without the worry—it's a win-win for everyone!


