

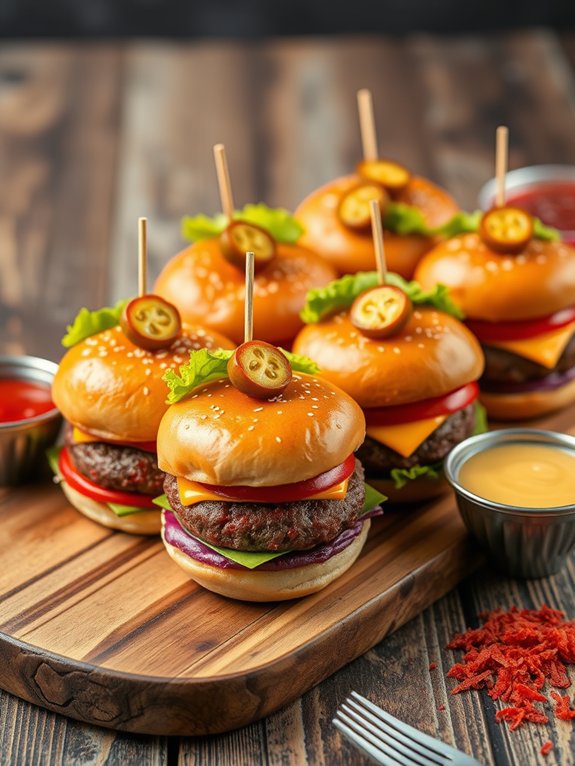
Cheeseburger Sliders
Cheeseburger sliders are mini flavor-packed delights that elevate any gathering! Picture juicy patties made from 80/20 ground beef, perfectly seasoned for that mouthwatering taste. You can use adorable slider buns and melt your favorite cheese on top—think Cheddar or Pepper Jack! Load on the toppings like crispy bacon, fresh lettuce, and zesty sauces for a custom bite of goodness. Whether you grill, bake, or pan-fry, these sliders are a hit! They're ideal for parties or quick meals. And, if you want to impress your guests even more, just wait till you discover all the fun serving ideas!
Recipe Highlights
- Use 80/20 ground beef for cheeseburger sliders, ensuring juiciness and flavor in every bite.
- Choose mini slider buns to perfectly complement the size of the cheeseburger patties.
- Melt your favorite cheese, such as Cheddar or American, on the patties for a classic cheeseburger taste.
- Enhance the sliders with toppings like lettuce, tomatoes, pickles, and sauces like Sriracha mayo for added flavor.
- Serve with sides like fries or coleslaw, and set up a slider bar for customizable options at gatherings.
Essential Ingredients for Sliders
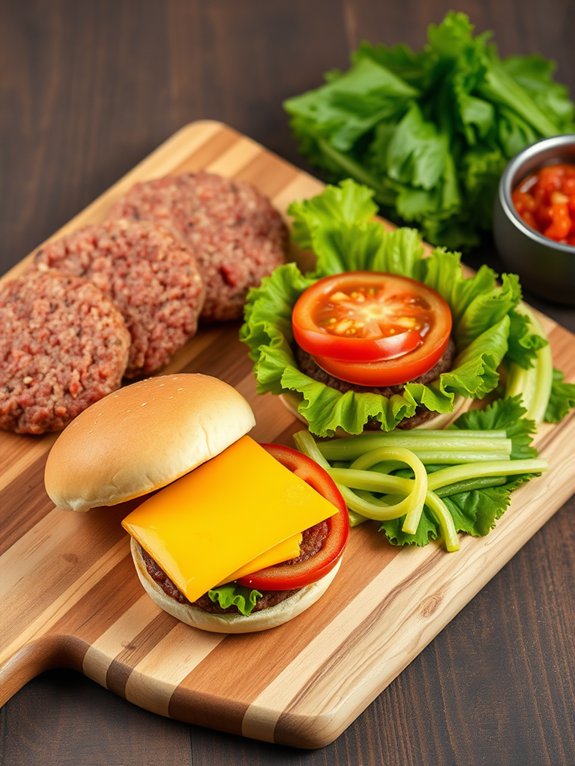
Creating delicious cheeseburger sliders starts with gathering the essential ingredients. First, you'll need ground beef, ideally with a bit of fat for that juicy flavor. Aim for about 80/20 meat-to-fat ratio; it makes a world of difference!
Next, grab some slider buns—miniature versions of your favorite burger buns. Don't forget cheese! Cheddar or American melts beautifully, adding that gooey goodness we all crave.
You can't overlook the toppings! Lettuce, tomatoes, pickles, and onions are classic choices that'll elevate your sliders. Want to kick it up a notch? Consider adding crispy bacon or jalapeños for a spicy twist.
Now, let's talk seasonings. Salt and pepper are must-haves, but feel free to experiment with garlic powder, onion powder, or even a dash of Worcestershire sauce for extra flavor. Using separate boards for different food types can help prevent cross-contamination.
For a finishing touch, you might want some condiments on hand—ketchup, mustard, or even barbecue sauce can bring your sliders to life.
With these ingredients at your fingertips, you're one step closer to creating mouthwatering cheeseburger sliders that'll wow your friends and family. Get ready for a delicious adventure!
Step-by-Step Slider Preparation
When it comes to preparing cheeseburger sliders, you'll want to start by forming the patties. Grab your ground beef and mix in your favorite seasonings, like salt, pepper, and maybe a pinch of garlic powder for a flavor boost.
Now, divide the meat into equal portions, about two ounces each, and roll them into balls before flattening them gently into patties. Remember, they'll shrink while cooking, so make them a tad larger than your slider buns.
Next, make a small indentation in the center of each patty. This little trick helps them cook evenly and prevents them from puffing up. You're almost there!
Set your patties aside for a few minutes to let the flavors meld, and while you wait, slice your slider buns in half.
Don't forget about your toppings! Grate some cheese, chop fresh veggies, and maybe even whip up a tasty sauce. Using high-quality stainless steel blades in your kitchen tools, such as poultry shears, can enhance your cooking experience and efficiency.
Once your sliders are ready to cook, you'll be set for a delicious meal. Soon, you'll be flipping those patties and stacking them high with delicious toppings, creating the ultimate cheeseburger sliders that'll make everyone grin from ear to ear! Enjoy every bite!
Cooking Methods for Perfect Sliders
Now that you've prepared your patties and toppings, it's time to cook them to perfection. You've got a few great methods to choose from, each bringing its own flair to your sliders. The key is to keep the heat consistent and not overcook those delicious patties!
Here's a quick comparison of popular cooking methods:
| Method | Pros | Cons |
|---|---|---|
| Grilling | Adds smoky flavor | Weather-dependent |
| Pan-frying | Easy cleanup and control | Can get greasy |
| Baking | Hands-off, even cooking | Takes longer |
Grilling is a classic choice, giving your sliders that irresistible char. If you can't grill, pan-frying is fantastic for a crispy outside while keeping the inside juicy. Baking is also an option, especially if you're making a large batch. Just pop them in the oven and let them work their magic! Using a deep sauté pan can also enhance your cooking technique, allowing for precise heat control and easy flipping.
Whichever method you choose, remember to keep an eye on the cooking time. Aim for that perfect medium-rare, and your sliders will be bursting with flavor. Get ready to enjoy the delicious results of your hard work!
Tasty Cheese Options to Consider
Choosing the right cheese can elevate your cheeseburger sliders to a whole new level. Imagine biting into a warm slider, gooey cheese melting perfectly over that juicy patty. Yum! You've got a world of delicious cheese options at your fingertips, just waiting to take your sliders from ordinary to extraordinary.
First up, classic cheddar is a crowd-pleaser, offering a sharp, tangy flavor that pairs effortlessly with beef. If you're feeling adventurous, try pepper jack! It adds a spicy kick that'll make your taste buds dance.
For a creamier texture, don't overlook mozzarella; it melts beautifully and adds a mild flavor, making every bite delightful. Feeling fancy? Go for blue cheese. Its bold taste brings a gourmet touch to your sliders that'll impress your friends.
And let's not forget Swiss cheese—its nutty flavor and holes make it a quirky addition that's sure to stand out. Additionally, consider using a variety of cheese knives to enhance your cheese presentation and serving experience.
No matter what cheese you choose, just remember to melt it right on top of your sliders for that ooey-gooey goodness. With these tasty cheese options, your cheeseburger sliders will be the talk of the party! Get ready to dig in!
Popular Toppings and Add-Ons
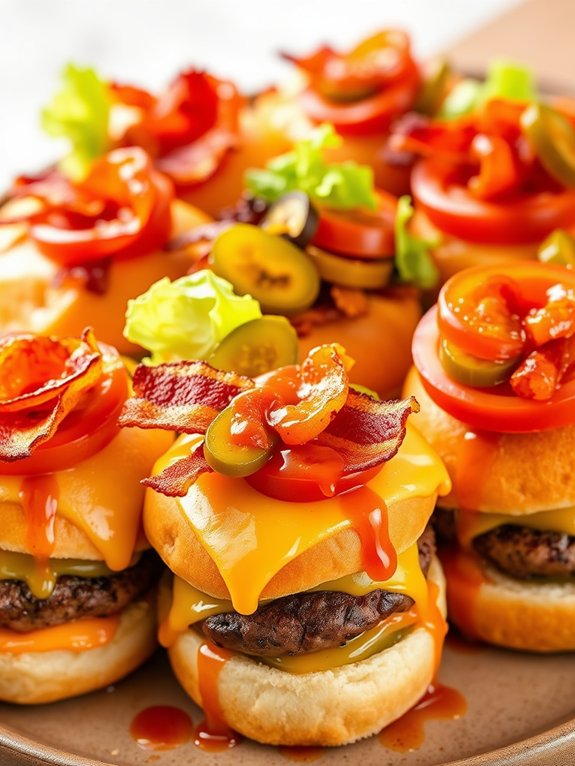
Toppings and add-ons can make or break your cheeseburger sliders, transforming them into a flavor-packed masterpiece. Imagine sinking your teeth into a juicy slider topped with crispy bacon, tangy pickles, and fresh lettuce. You can't go wrong with classic ketchup and mustard, but don't forget about zesty barbecue sauce or a dollop of creamy ranch dressing to kick it up a notch!
Feeling adventurous? Try adding sautéed mushrooms or jalapeños for an extra kick. If you love a bit of crunch, throw on some crispy fried onions or coleslaw to elevate your sliders even more.
And let's not forget about the cheese! Melted cheddar, gooey Swiss, or spicy pepper jack can take your sliders to the next level.
For a gourmet touch, consider caramelized onions or avocado slices, which add richness and depth. You can even mix in unique flavors like sriracha mayo or garlic aioli for that extra zing. Additionally, using eco-friendly cocktail picks to serve your sliders can enhance the presentation while being kind to the environment.
With so many delicious options, you can customize your sliders to suit any palate. So, gather your favorite toppings, get creative, and prepare to impress your friends and family with your cheeseburger slider creations!
Creative Slider Variations to Try
Your cheeseburger sliders can take on a whole new personality with creative variations that excite the taste buds.
Why settle for the same old thing when you can whip up sliders that surprise and delight? Here are three fun ideas to get you started:
- BBQ Bacon Sliders: Top your patties with smoky BBQ sauce, crispy bacon, and a slice of cheddar cheese. The combination of flavors is irresistible, and you'll feel like a grill master in no time!
- Mediterranean Sliders: Swap out traditional toppings for tzatziki sauce, feta cheese, and fresh cucumber slices. This invigorating twist will transport you to a sunny Greek island, minus the flight.
- Spicy Jalapeño Sliders: For those who love a kick, add jalapeños, pepper jack cheese, and a drizzle of sriracha. These sliders will bring the heat, making every bite a fiery adventure!
Experimenting with these variations opens up a world of flavor possibilities. Additionally, making sliders is perfect for large gatherings(#) where you can accommodate a variety of tastes.
Your taste buds will thank you, and your friends will be begging for the recipes.
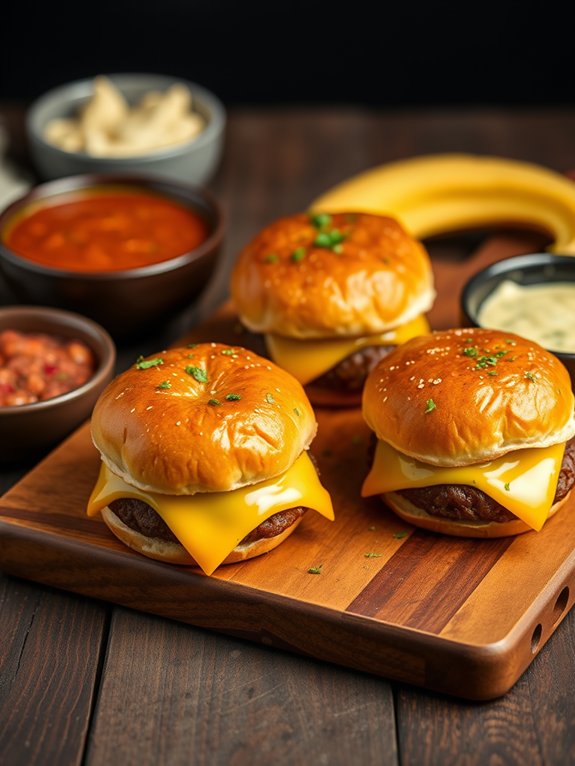
Serving Suggestions and Pairings
Once you've crafted those mouthwatering cheeseburger sliders, it's time to think about how to serve them up for maximum enjoyment.
Envision this: a platter stacked high with your sliders, garnished with vibrant lettuce and juicy tomato slices, beckoning everyone to dig in. You can serve them alongside crispy golden fries or sweet potato wedges for that perfect crunch.
Don't forget the dipping sauces! A zesty barbecue sauce or creamy ranch dressing can elevate the flavor experience, giving your guests options to explore.
For a fresh twist, add a side of tangy coleslaw, which balances the richness of the sliders beautifully.
Pair your sliders with some revitalizing beverages like ice-cold lemonade or craft beers, which complement the savory goodness perfectly.
If you're feeling adventurous, why not whip up a fun slider bar? Set out toppings like sautéed mushrooms, caramelized onions, and various cheeses, letting everyone build their dream slider. Additionally, presenting your sliders on a durable serving platter can enhance the overall dining experience and make serving effortless.
Tips for Meal Prep and Storage
When it comes to meal prep and storage for your cheeseburger sliders, planning ahead can save you time and guarantee deliciousness.
Whether you're cooking for a crowd or just want tasty leftovers, these tips will help you enjoy your sliders longer and keep them fresh.
1. Prepare in Batches: Cook a big batch of sliders on the weekend.
You can freeze the extras for quick meals during the week! Just make sure to cool them completely before freezing to prevent sogginess.
2. Use Airtight Containers****: Store your sliders in airtight containers.
This keeps them fresh and prevents them from drying out. If you're stacking them, place parchment paper between layers to avoid sticking. Using BPA-free materials helps ensure that your food is stored safely and without harmful chemicals.
3. Label and Date: Always label your containers with the date.
This way, you'll know how long they've been stored, and you can enjoy them at their best!
Kid-Friendly Slider Ideas
Since kids love fun and tasty meals, cheeseburger sliders can be easily adapted to suit their preferences. You can get creative with ingredients and flavors that will make your little ones smile!
Start with classic beef sliders, then add fun toppings like crispy bacon, melted cheese, or even a slice of pickle. Kids often enjoy colorful foods, so you might want to include some diced tomatoes or lettuce for a fresh crunch.
For a twist, try turkey or chicken sliders, seasoned with kid-friendly spices like garlic powder or a hint of barbecue sauce. You could also make mini sliders using meat alternatives, such as veggie patties or beans, to cater to different dietary needs.
Don't forget about the buns! You can use whole-grain mini buns or even cut larger ones into smaller sizes for a perfect fit. Additionally, consider using durable materials for mixing bowls, which can enhance your cooking experience as you prepare these delicious sliders.
Let your kids join in the fun by letting them build their own sliders. Set up a slider bar with a variety of toppings and let them go wild!
These kid-friendly ideas won't only satisfy their taste buds but also make mealtime an exciting adventure. Happy slider-making!
Hosting a Slider Party
A slider party is a fantastic way to bring friends and family together for a fun and interactive meal. Everyone loves sliders, and the best part is that you can customize them to fit every taste!
Get ready to roll up your sleeves and create a delicious experience that'll have everyone talking.
Here's how to host an unforgettable slider party:
- Slider Station: Set up a slider station with various meats, cheeses, and toppings. Think juicy beef, crispy bacon, tangy pickles, and creamy sauces—let your guests build their masterpieces!
- Side Dishes: Don't forget the sides! Offer tasty options like sweet potato fries, crispy onion rings, or a fresh salad. These will complement the sliders perfectly and keep everyone satisfied.
- Drinks and Desserts: Keep the fun going with invigorating drinks and sweet treats. Serve up classic sodas or themed cocktails, and finish off with mini desserts like brownie bites or cookie sandwiches.
With these elements in place, your slider party will be a hit!
Frequently Asked Questions
Can I Use Ground Turkey Instead of Beef for Sliders?
Absolutely, you can use ground turkey instead of beef for sliders!
Ground turkey's lean and flavorful, making it a fantastic alternative. Just season it well with your favorite spices, and you'll be amazed at how delicious it turns out.
Plus, it's a healthier option if you're looking to cut down on fat.
How Do I Prevent Sliders From Drying Out?
To prevent your sliders from drying out, keep a few tricks up your sleeve!
First, add moisture by mixing in ingredients like grated onion or a splash of broth.
Don't forget to avoid overcooking; use a meat thermometer to hit the sweet spot of doneness.
Finally, consider covering them with foil while they rest—this helps retain that juicy goodness.
With these tips, your sliders will be bursting with flavor! Enjoy every bite!
What's the Best Way to Reheat Leftover Sliders?
Reheating leftover sliders is like giving them a warm hug!
To revive their glory, preheat your oven to 350°F. Wrap each slider in foil to keep them cozy and place them on a baking sheet. Heat for about 10-15 minutes, until they're warmed through.
Alternatively, you can use a microwave for quick results, but you might lose that delightful crispy edge.
Either way, you'll have a delicious treat waiting for you! Enjoy!
Are Cheeseburger Sliders Suitable for Freezing?
Absolutely, you can freeze those delicious sliders!
Just wrap them tightly in plastic wrap or aluminum foil, then pop them into an airtight container or freezer bag. This keeps them fresh and tasty for up to three months.
When you're ready to enjoy them again, let them thaw in the fridge overnight. Reheat them in the oven for that crispy texture you love.
You'll be savoring every bite just like the first time!
How Can I Make Sliders Gluten-Free?
To make sliders gluten-free, you'll want to swap out regular buns for gluten-free ones. You can find tasty options made from rice flour, almond flour, or even cauliflower!
When choosing your ingredients, double-check labels to avoid hidden gluten. Get creative with toppings—avocado, salsa, or cheese can add flavor without a gluten hitch.
Trust me, your gluten-free friends will love them, and you'll have a blast whipping up this delicious twist!


