

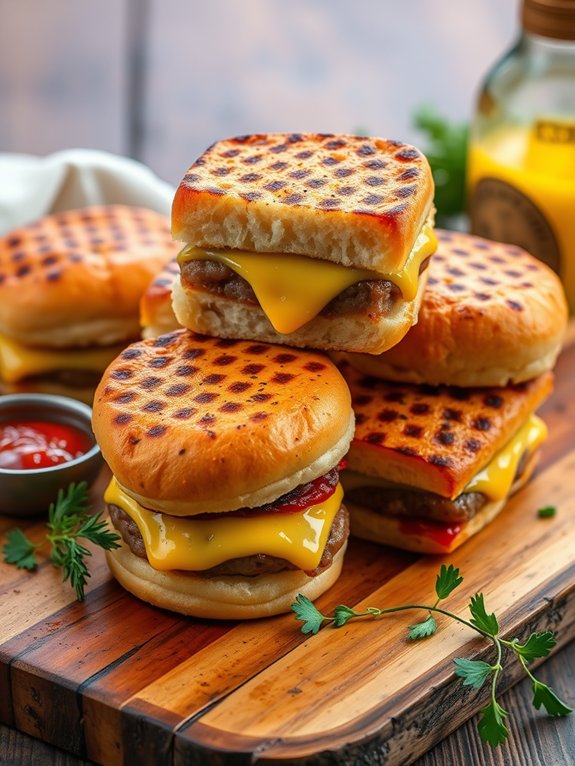
Grilled Cheese Cheeseburger Sliders
Grilled cheese cheeseburger sliders are a mouthwatering delight that you can't resist! Start with juicy ground beef patties, ideally an 80/20 blend for the perfect flavor. Grill them until they're golden and top them with melty American cheese or your favorite variety. Slip those cheesy patties onto soft slider buns and pile on crispy bacon, fresh veggies, and zesty condiments to elevate every bite. Brush the buns with melted butter for added yum! These sliders are perfect for parties or cozy nights in, and they're sure to impress everyone! Who wouldn't want to discover more about this scrumptious dish?
Recipe Highlights
- Use juicy 80/20 ground beef for flavorful patties, seasoned with salt, pepper, garlic powder, and smoked paprika.
- Cook patties on a preheated grill or skillet for 3-4 minutes per side until they reach 160°F.
- Choose melting cheese like American or Gruyère, placing it on patties before finishing cooking to achieve a gooey texture.
- Assemble sliders on soft buns, stacking cooked patties and desired toppings like lettuce, tomato, and crispy bacon.
- Serve with a variety of sauces, such as spicy mayo or zesty barbecue, to enhance flavor and enjoyment.
Ingredients You'll Need
To whip up these delicious Grilled Cheese Cheeseburger Sliders, you'll need a handful of key ingredients that bring the best of both worlds together.
First off, grab some ground beef—this is the heart of your sliders, so choose a blend that's juicy and flavorful. Next, pick up some slider buns; you want them soft yet sturdy enough to hold all the cheesy goodness.
Now, let's talk cheese! You can't go wrong with good ol' American cheese for that gooey melt, but feel free to experiment with cheddar or pepper jack if you're feeling adventurous.
Don't forget the toppings! Slices of crispy bacon can elevate your sliders to a whole new level, while fresh lettuce, tomatoes, and pickles add that invigorating crunch.
You'll also need some seasoning like salt, pepper, and maybe a dash of garlic powder to pack in the flavor.
Finally, a bit of butter will help you grill those buns to golden perfection. Additionally, consider using a multifunctional appliance like the Instant Pot Duo to speed up the cooking process and create a variety of delicious meals.
With these ingredients in hand, you're ready to create a slider masterpiece that's sure to impress your friends and family.
Get excited—these Grilled Cheese Cheeseburger Sliders are bound to be a hit!
Preparing the Beef Patties
Now that you've gathered all the ingredients, it's time to prepare the beef patties. First, grab a large mixing bowl and toss in your ground beef. You want to use a blend with a nice fat content—about 80/20 works perfectly for juicy sliders.
Sprinkle in some salt and pepper, then mix it all together with clean hands. Don't overdo it; you want the patties tender, not tough!
Next, divide the mixture into equal portions, about 2 ounces each. Roll them gently into balls, then flatten them into disks about half an inch thick. Make a small indentation in the center of each patty—this helps them cook evenly and prevents that pesky puffing up during grilling.
Now, heat up your grill or skillet to medium-high. Once it's hot, place your patties on the surface, and listen for that satisfying sizzle!
Cook them for about 3-4 minutes on one side, then flip and keep an eye on the time. You want a nice brown crust, and the internal temperature should reach 160°F for safety. Using a quality meat grinder can ensure you have the perfect ground beef blend for your burgers, enhancing both texture and flavor with multi-functional use capabilities.
Get ready; these sliders are about to take your taste buds on a delicious adventure!
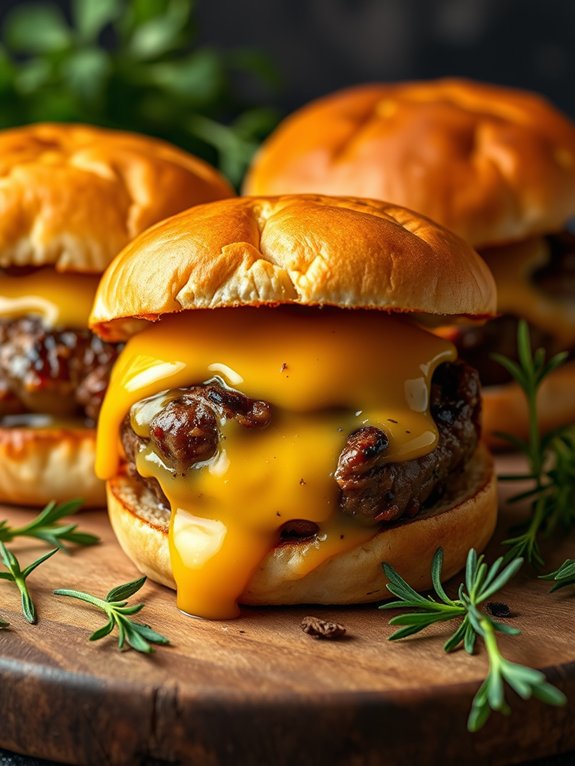
Melting the Cheese
Here's the revised content as per your instructions:
As the beef patties finish cooking on the grill, it's time to focus on melting the cheese that'll take your sliders to the next level. You want that gooey, melty goodness that oozes out the sides, right? Choose your cheese wisely—different types melt in different ways, and this choice can make or break your slider experience.
Here's a quick comparison to help you decide:
| Cheese Type | Melting Characteristics |
|---|---|
| American | Melts easily, super creamy |
| Cheddar | Melts well, adds sharp flavor |
| Gruyère | Rich and nutty, melts beautifully |
Once you've picked your cheese, lay a slice over each patty just before they finish cooking. Cover the grill for a minute or two to trap the heat, allowing the cheese to melt perfectly. Keep an eye on it; you don't want it to overdo! When you lift the lid, the sight of that bubbling, melted cheese will make your mouth water. Trust me, the anticipation is half the fun! Remember, using high-quality non-stick coatings can enhance your cooking experience by preventing cheese from sticking to the pan. Now, you're one step closer to creating the ultimate grilled cheese cheeseburger sliders!
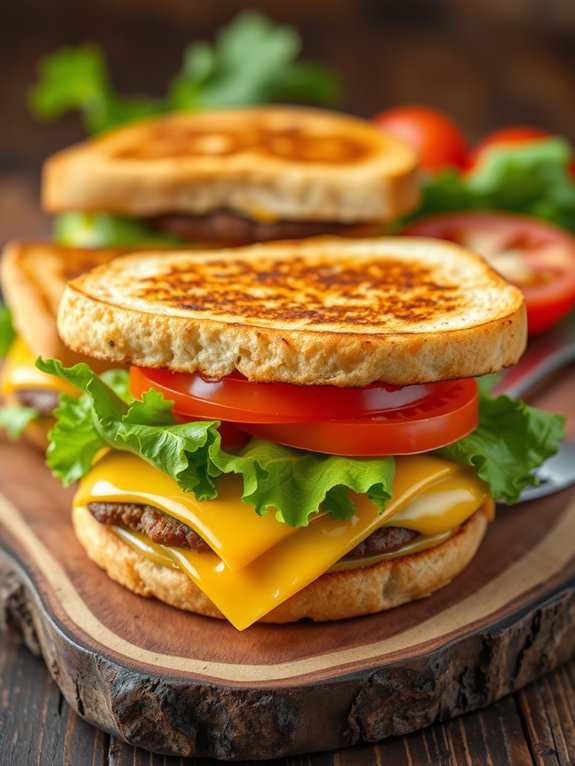
Assembling the Sliders
How do you turn those perfectly cooked patties and gooey cheese into mouthwatering sliders? It's all about the assembly!
First, grab your slider buns—these little guys are a key part of the experience. Slice them in half and lay them out on a clean surface.
Now, let's get stacking! Start by placing a juicy patty right on the bottom half of each bun. The warmth from the patty will help melt that gooey cheese even more, creating a delightful ooze that you'll love.
Next, add any toppings you fancy. Maybe some crisp lettuce for a revitalizing crunch, a slice of tomato for a juicy burst, or a dollop of tangy ketchup or mustard to kick things up a notch. Don't forget the pickles if you're feeling adventurous!
Once you've got your toppings in place, gently crown each creation with the top half of the bun.
For an extra touch, you can brush the tops with a little melted butter or garlic for flavor. Using a good pair of poultry shears can help you easily cut the sliders in half for serving!
Now, step back and admire your sliders! You're just moments away from enjoying a delicious bite of grilled cheese cheeseburger heaven. Get ready to dig in!
Cooking Techniques
When it comes to cooking your grilled cheese cheeseburger sliders, mastering the right techniques is crucial for achieving that perfect balance of flavor and texture. Start by preheating your skillet over medium heat. This guarantees a nice, even cook, preventing your sliders from burning while the cheese melts.
Next, form your burger patties with care. Make them slightly larger than the slider buns, as they'll shrink while cooking. Season them well with salt and pepper, and don't be shy!
Once your skillet is hot, add the patties, allowing them to sear for about three minutes on each side. This creates a delicious crust that locks in all that juicy goodness.
Now, let's talk cheese! After flipping the patties, place your cheese slices on top to melt perfectly. Cover the skillet for a minute to trap in the heat and help the cheese ooze beautifully.
For the bread, butter each side generously before grilling it in the same skillet. This gives your sliders that crispy, golden finish we all crave.
Additionally, using a cast iron skillet enhances heat retention which is ideal for achieving that perfect crust on your sliders.
Flip them carefully, and you're on your way to slider perfection! Enjoy the process, and watch your friends devour your delicious creation!
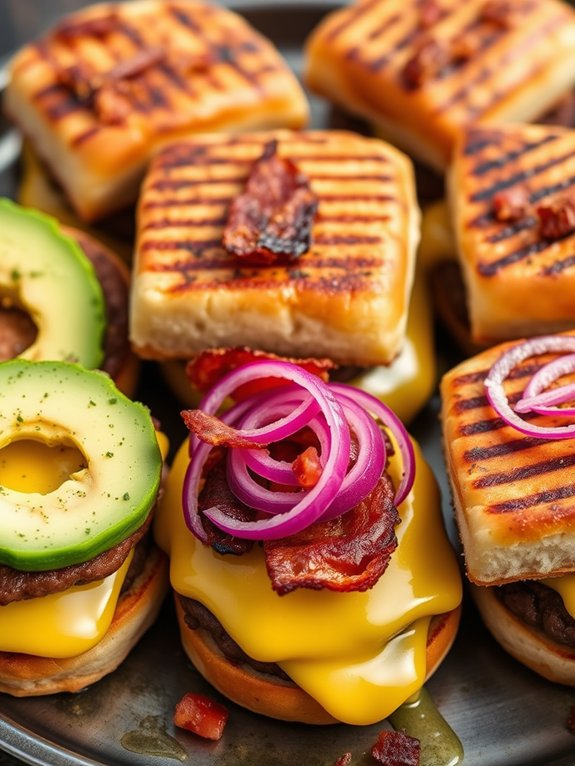
Serving Suggestions
Grilled cheese cheeseburger sliders are a crowd-pleaser, making them perfect for parties or casual gatherings. Imagine this: a vibrant platter of these cheesy delights, golden and melty, enticing everyone to dig in. Serve them hot, right off the grill, for that ooey-gooey goodness that everyone craves.
To elevate your serving game, consider pairing these sliders with a variety of dips. A zesty ranch or tangy barbecue sauce adds that extra zing, while creamy garlic aioli brings a gourmet twist.
Don't forget the sides! Crispy sweet potato fries or a fresh garden salad can balance out the richness of the sliders, and they're sure to impress your guests.
For an extra touch, why not create a slider bar? Lay out an array of toppings—think crispy bacon, sautéed mushrooms, or fresh avocado—so everyone can customize their own mini masterpiece. You can even add fun garnishes like pickles or jalapeños for a kick!
With these serving suggestions, you'll turn your grilled cheese cheeseburger sliders into the star of the show. Additionally, presenting them on a durable serving platter will not only enhance the visual appeal but also ensure that the sliders remain stable and intact throughout the meal. Get ready for compliments, and enjoy the delicious chaos as everyone dives in!
Tips for Customization
Customizing your grilled cheese cheeseburger sliders can take them from delicious to unforgettable. One of the easiest ways to elevate your sliders is by experimenting with different cheeses.
Try sharp cheddar for a bold kick, or gooey mozzarella for that melty goodness. Don't stop there—add layers of flavor with toppings like crispy bacon, sautéed mushrooms, or tangy jalapeños!
Next, consider your sauces. A drizzle of spicy mayo or zesty barbecue sauce can make a world of difference.
Feeling adventurous? Whip up a homemade garlic aioli for a gourmet touch.
As for the buns, why not switch it up? Use mini pretzel buns for a salty crunch or even sweet Hawaiian rolls for a delightful contrast.
Don't forget about the seasonings! A sprinkle of garlic powder, onion powder, or even a pinch of smoked paprika can kick your sliders into high gear. Additionally, using a high-quality spatula set can enhance your cooking experience as you flip and serve your sliders with ease.
Frequently Asked Questions
Can I Use a Different Type of Cheese for These Sliders?
Absolutely, you can use a different type of cheese for those sliders!
You're not limited to just one flavor. Think about gooey mozzarella for that stretchy goodness or sharp cheddar for a zesty kick.
Even creamy brie can elevate your sliders to gourmet status! Just keep in mind that the melting quality matters, so choose wisely.
Experimenting with different cheeses can lead to delightful surprises, making your sliders uniquely yours.
Enjoy the tasty adventure!
How Do I Store Leftovers From Grilled Cheese Cheeseburger Sliders?
To store your delicious leftovers, let those sliders cool down first.
Then, wrap them tightly in plastic wrap or foil, or pop them in an airtight container. You want to keep that cheesy goodness safe!
Refrigerate them for up to three days. When you're ready to enjoy again, reheat in the oven or skillet for that crispy delight.
Trust me, you won't want to miss out on the flavor explosion!
What Sides Pair Well With Grilled Cheese Cheeseburger Sliders?
Did you know that nearly 80% of people love pairing their sandwiches with fries?
When you're enjoying your sliders, consider crispy sweet potato fries or classic potato wedges—they're always a hit!
A revitalizing side salad with tangy vinaigrette can balance the richness too.
You might even try some crunchy pickles or coleslaw for that perfect crunch.
These sides not only complement your meal but also add a burst of flavor and fun!
Can I Make These Sliders Ahead of Time?
Absolutely, you can make those delicious sliders ahead of time!
Just prepare them as usual, and then store them in an airtight container in the fridge.
When you're ready to serve, pop them in the oven to warm up and melt that gooey cheese.
It's a fantastic way to save time, especially for parties or gatherings.
Your friends will be impressed, and you'll still have time to enjoy the fun!
Are There Vegetarian Options for the Beef Patties?
Absolutely, there are tons of delicious vegetarian options for beef patties! You can whip up sliders using black bean patties, lentil burgers, or even portobello mushrooms for that hearty texture.
If you're feeling adventurous, try chickpea patties or quinoa-based options, too! These alternatives pack in flavor and protein while catering to your vegetarian friends.


